You know, every Product-Led Growth (PLG) company dreams of nailing that perfect onboarding experience. But let's be real, it's a tough nut to crack.
Between the information deluge, intricate interfaces, and the need for instant support, it can feel like navigating a maze.
That's why we've put together this guide. Think of it as your roadmap to creating a smooth, product-led onboarding process that puts your product front and center. We’ll share actionable steps to enhance your complete customer onboarding experience.
So, let's roll up our sleeves and dive into some actionable insights to transform your onboarding journey.
What product-led onboarding looks like in action
Product-led onboarding (PLO) is a user onboarding strategy that prioritizes the product experience. It's a part of the product-led growth (PLG) approach, which emphasizes driving growth through the product itself, rather than traditional sales and marketing techniques.
PLO aims to drive users towards value right from the start, ensuring they understand and appreciate the product's capabilities and benefits early in their journey.
Benefits of PLO for SaaS Businesses
PLO offers several benefits, making it crucial for SaaS businesses. Here
User Empowerment: PLG puts the product at the forefront, allowing users to explore and understand its value on their own terms. This self-service model empowers users and leads to a more personalized experience.
Reduced Sales Costs: With PLG, the product sells itself. This reduces the need for large sales teams and lowers the overall cost of customer acquisition.
Improved Product Adoption: By focusing on the product experience from the start, users are more likely to adopt and use the product effectively, leading to higher engagement and retention rates.
Scalability: PLG models are inherently scalable. As the product improves and evolves, it can attract and retain more users without a proportional increase in sales or marketing efforts.
Customer Advocacy: Satisfied users of a product-led business are more likely to become advocates, promoting the product through word-of-mouth and contributing to organic growth.
Building Effective Product-Led Onboarding Flows: 5 Best Practices [+examples]
Let’s look at five proven onboarding best practices to deliver a truly product-led experience to new users.
1. Create a streamlined sign-up process
A streamlined sign-up process is the gateway to user acquisition and retention in the SaaS world. It's the first interaction users have with your product, setting the tone for their overall experience.
A smooth, intuitive process can significantly enhance user satisfaction, leading to higher conversion rates and lower churn. Here are a few tips to streamline SaaS customer onboarding:
Social Sign-Up Options: With social sign-ups, users won't need to remember another username and password, and it can speed up the process significantly.
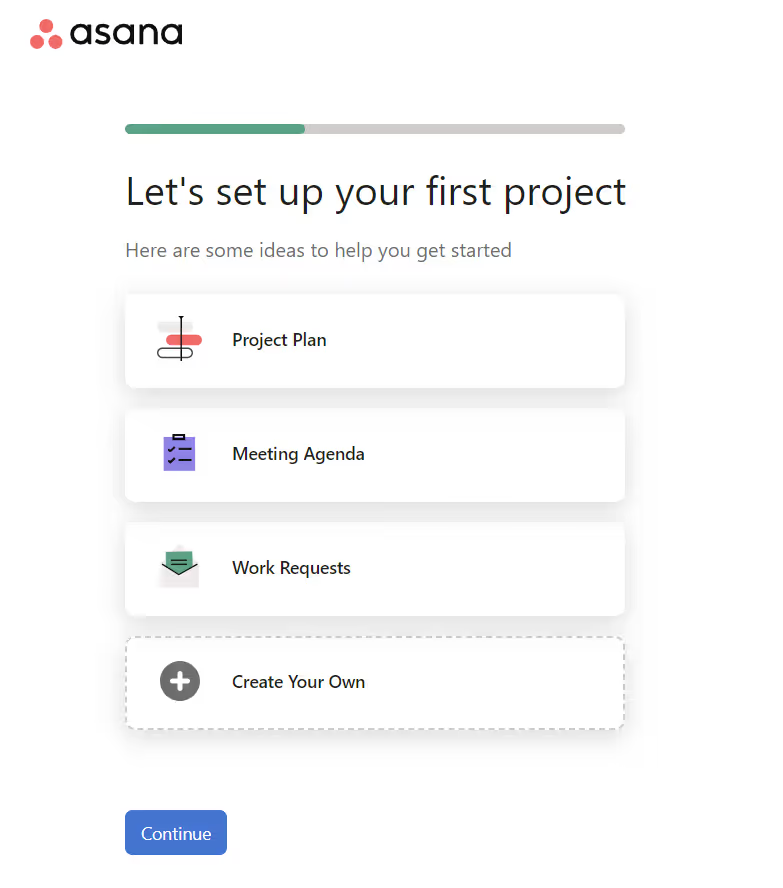
Progress Indicators: If your sign-up process involves multiple steps, use progress indicators. This gives users a sense of how much longer the process will take. Asana uses progress bars effectively during their sign-up process.
Instant Gratification: Once users have signed up, let them experience some form of instant gratification with a personalized welcome message, a quick tour of your product, or even a simple task that they can complete.
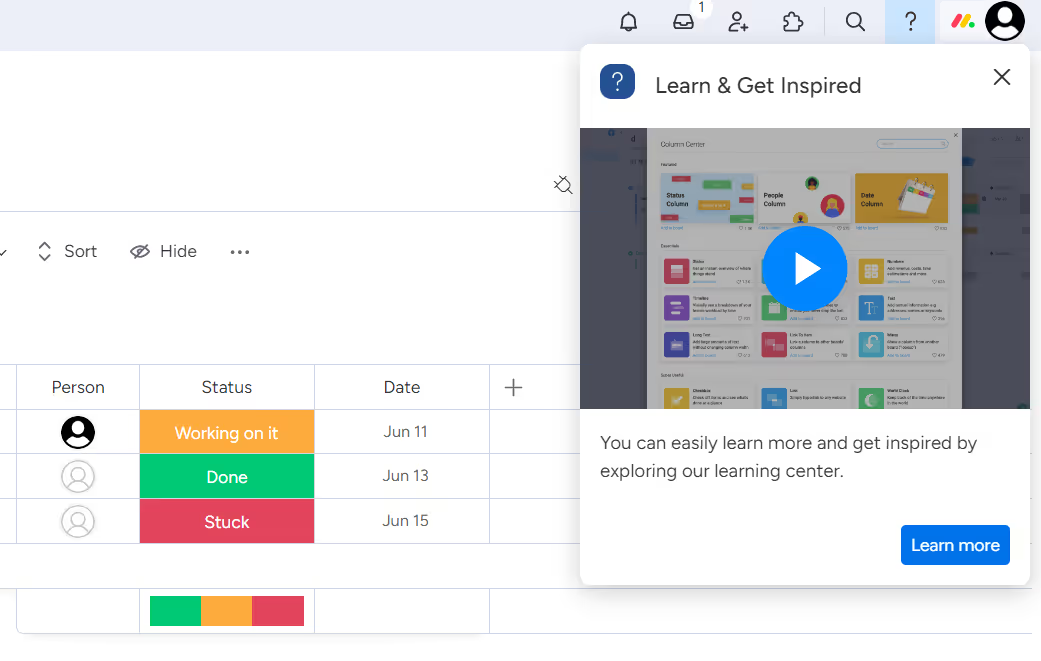
Guided Onboarding: After sign-up, guide your users through the initial setup process. This could be a series of tooltips, a product tour, or an interactive walkthrough. Here’s how monday.com shares tooltips and video tutorials once a user signs up on the platform.
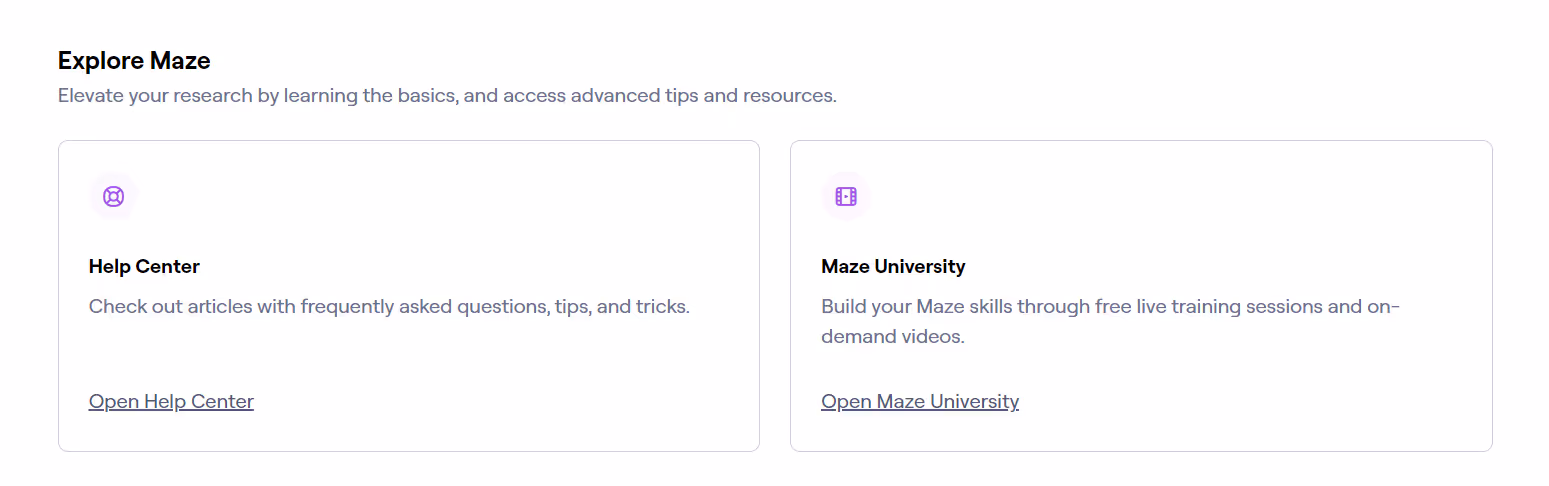
Support and Help: Make it easy for users to get help if they need it during the sign-up process. This could be through a live chat, a help center, or even a simple FAQ. For example, Maze shows options to access the help center in your welcome screen directly.
In a time where users are inundated with choices, a frictionless sign-up process can be a decisive factor in choosing your product over a competitor's. It shows respect for the user's time and can help establish trust from the outset.
2. Offer interactive in-app onboarding flows
Interactive in-app onboarding is like having a friendly guide by your side as you explore a new city. It's about showing your users around your product, helping them understand its features, and guiding them to achieve their first success.
This hands-on approach not only helps users understand your product better but also allows them to see the value it can bring to their work or life.
Here’s a great example of an interactive onboarding flow by Evernote. They use tooltips and an onboarding checklist to make the process interactive and fully guided.
Follow these onboarding best practices to create a seamless flow for new users:
User Segmentation: Tailor your onboarding experience based on user roles, needs, or behavior. Not all users are the same, and a one-size-fits-all approach may not work.
Show, Don't Tell: Use interactive tutorials or walkthroughs to guide users through your product. Let them learn by doing.
Focus on Key Features: Highlight the most valuable features of your product during the onboarding process. Show users how these features can solve their problems.
Provide Context: Explain why certain features or steps are important. This helps users understand the value of your product.
Keep it Short: Don't overwhelm users with too much information at once. Keep your onboarding flow concise and focused.
Interactive in-app onboarding flows can significantly reduce the learning curve associated with new software. By guiding users through the essential features and functions, they can quickly get up to speed and start using the product effectively.
3. Deliver a personalized welcome sequence
A personalized welcome sequence makes users feel valued and recognized, setting the tone for a positive user experience. It's an opportunity to show users that you understand their needs and are ready to help them achieve their goals.
This personalized touch can significantly enhance user engagement and satisfaction, leading to higher retention rates.
Take a page out of Hotjar’s book with a welcome sequence like this. Take crucial details from each user and set them up for success from the start with a personalized setup.
Here’s how you can personalize your product-led onboarding sequence:
Understand your users' roles, industries, and needs. Use this information to personalize your welcome sequence.
Let users know what they can expect from your product and the onboarding process. This helps set the stage for a positive user experience.
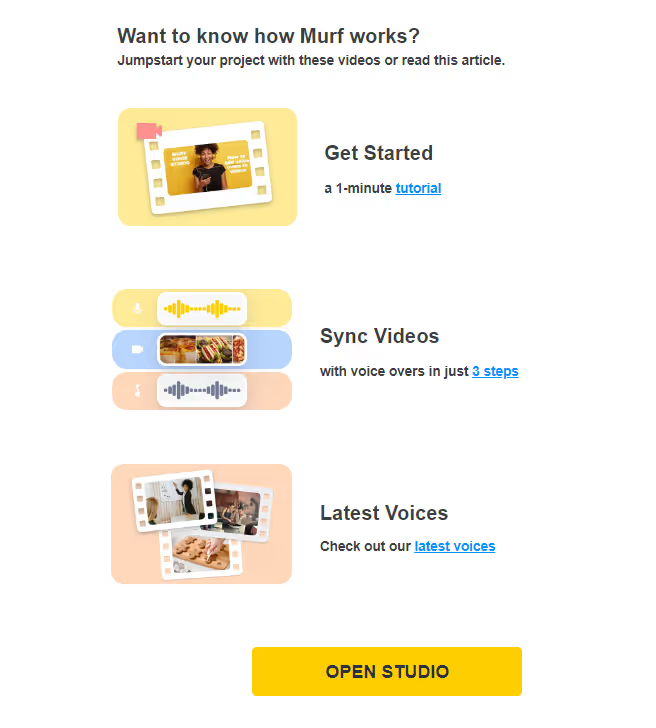
Offer self-serve resources that are relevant to the user's role or needs. This could be tutorials, case studies, or tips and tricks. Look at how Murf shares such resources with new users in a welcome email.
Use personalization tokens for the user's name, company, or other information in your welcome sequence. This adds a personal touch and makes users feel valued.
Don't stop at the welcome message. Follow up with additional resources, tips, or support to help users get the most out of your product.
Remember, a personalized welcome sequence is your first opportunity to engage with your users. Make it count by making it personal, relevant, and supportive.
4. Discover and guide users to aha! moments
The "aha!" moment is when a user truly understands the value of your product. It's that lightbulb moment when they see how your product can solve their problem or make their life easier.
Guiding users to this moment as quickly as possible is crucial because that’s when they transition from just trying out your product to becoming engaged and invested users.
When users see the value of your product, they're more likely to continue using it and even become advocates for your brand. It's about not just telling users about the value of your product, but letting them experience it for themselves.
We’ve rounded up proven techniques to take users to aha! moments:
Behavioral Analytics: Use behavioral analytics to understand how users interact with your product. Identify patterns that lead to "aha!" moments and replicate these in your onboarding process.
User Journey Mapping: Create a detailed map of the user journey to visualize the path to the "aha!" moment. This can help you identify potential roadblocks and opportunities for improvement.
Personalized Onboarding Paths: Based on user roles or goals, create personalized onboarding paths that guide users to their unique "aha!" moments. This can increase the relevance and effectiveness of your onboarding process.
Contextual Onboarding: Deliver onboarding content when and where it's most relevant. For example, use in-app messages to guide users to key features when they're most likely to need them.
Iterative Testing: Continuously test and refine your onboarding process based on user feedback and behavior. Remember, what leads to an "aha!" moment for one user may not work for another.
Cross-Functional Collaboration: Work closely with your product, sales, and customer success teams to understand different perspectives on what drives "aha!" moments. This can lead to a more holistic and effective onboarding process.
5. Enable self-serve user support at every step
Self-serve user support is not just about providing answers; it's about empowering users to discover and learn at their own pace. This autonomy fosters a sense of ownership and competence, which are key drivers of user engagement and satisfaction.
When users feel capable of navigating and mastering a product on their own, they're more likely to perceive the product as valuable and stick around.
Besides, you can also get insights into your users' needs and challenges through self-serve support. By analyzing the most frequently accessed or requested resources, you can identify common roadblocks or areas of confusion in your product.
This can inform product development, user experience design, and of course, the continuous improvement of your onboarding process.
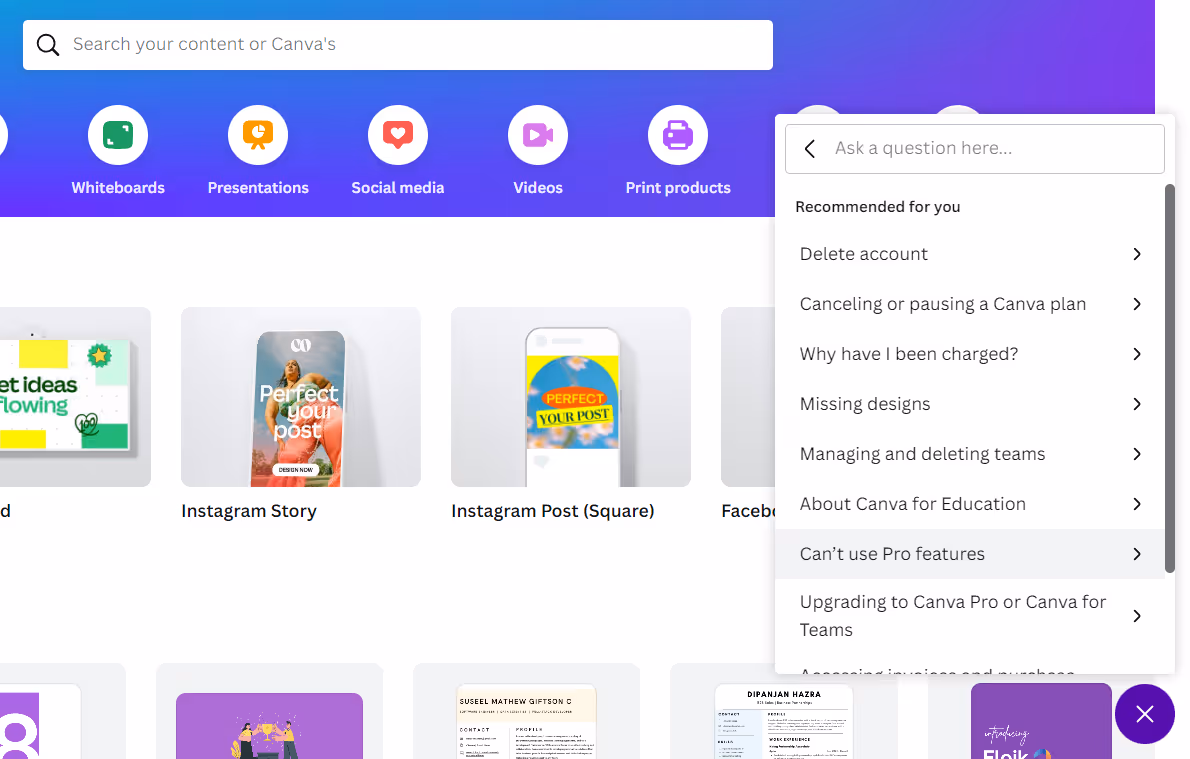
For example, Canva’s self-serve support is easily accessible with its help icon on the bottom-right part of the screen. New users can quickly search answers for their questions without leaving the product at all.
💪🏻 Effortlessly create your self-serve library with Floik
From explainer videos to step-by-step guides, Floik can help you make self-serve support content in minutes.
Capture your product in action and record different features, then Floik will convert each screen recording into a how-to-guide or video. You can create content in one format and convert it into other formats—how-to guides, videos, and interactive demos.
Watch how Floik works in this output 👇🏻
How to build a seamless product-led onboarding experience
Here’s a five-step process to help you build your SaaS onboarding experience from scratch aligned with the best practices we discussed above:
1. Outline your customer onboarding goals
Start with the end in mind. What should users achieve by the end of the onboarding process? Maybe it's sending their first invoice, creating a project, or setting up a profile.
Define these goals for each user persona and make them specific, measurable, achievable, relevant, and time-bound (SMART). This clarity will guide your onboarding design and help you measure its success.
Here’s an example of SMART goals for user onboarding:
Specific: Users should be able to create their first project within the platform.
Measurable: 80% of new users should create their first project within a week of signing up.
Achievable: Provide step-by-step guidance during onboarding to help new users create their first project.
Relevant: Creating a project is a core feature of the platform and a key step towards users finding value in the product.
Time-bound: Track the number of users who create their first project within the first week of signing up.
These goals are clear, directly related to the product's main functionality, and provide a specific timeline and success metric.
2. Identify your ICP’s primary jobs to be done
Get into your users' shoes. What tasks are they trying to accomplish using your product? These are their 'jobs to be done'.
Conduct user interviews, send out surveys, or use in-app analytics to gather this data. This understanding will ensure your onboarding process is tailored to your users' needs, making it more effective and user-friendly.
Use this handy list of questions when trying to identify JTBDs for your ICP:
What task are you trying to accomplish with our product? This open-ended question can help you understand the primary reason users are turning to your product.
What were you using to accomplish this task before you started using our product? This can give you insight into what your product is replacing and the problems users faced with the previous solution.
What is the biggest challenge you face when trying to accomplish this task? This can help you identify pain points and areas where your product can provide a solution.
What would make accomplishing this task easier or more efficient? This can help you identify potential features or improvements to your product.
How would you measure success in accomplishing this task? This can help you understand what outcomes users are looking for, which can inform your onboarding goals.
Remember, the goal is to understand the job your product is being "hired" to do. The more accurately you can identify this, the better you can tailor your onboarding process to guide users towards achieving their desired outcome.
3. Visualize the end-to-end onboarding process
Visualize the entire onboarding journey from start to finish. Use a flowchart or storyboard to map out each step, from signing up to achieving the onboarding goals you set earlier.
This visual map will help you spot any potential roadblocks or confusing steps in the process, allowing you to address them before they frustrate your users.
In general, a visual map for the onboarding process might look something like this:
Sign Up: The user creates an account.
Welcome Email: The user receives a welcome email with a brief overview of the product and next steps.
First Login: The user logs into the product for the first time.
Product Tour: The user is guided through a product tour highlighting key features.
First Key Action: The user completes their first key action (e.g., creating a project, sending an invoice, etc.).
Follow-Up Communication: The user receives follow-up communication encouraging them to continue using the product and highlighting additional features.
Achievement of Onboarding Goals: The user has achieved the onboarding goals set out at the beginning of the process.
4. Simplify the user interface and minimize barriers
Less is more when it comes to user interfaces. Keep your design clean and intuitive. Remove unnecessary steps, use clear and concise language, and guide users with visual cues like arrows or highlights.
The easier it is for users to navigate your product, the quicker they'll find value in it.
Follow these best practices to optimize your product UI for new users:
Use Progressive Disclosure: This design technique involves revealing information or options as they become relevant, rather than all at once. This can help to keep the interface clean and focused, reducing cognitive load for users.
Implement Clear Navigation: Ensure that users can easily find their way around your product. Use clear labels for menus and buttons, and maintain a consistent layout across different parts of your product.
Provide Contextual Help: Use tooltips, pop-ups, or inline help text to provide users with additional information or guidance when they need it. This can help users understand how to use different features without leaving the task at hand.
Design for Efficiency: Minimize the number of steps required to complete common tasks. Use default settings where appropriate, and remember that every extra click or interaction can add to the user's cognitive load.
Add Visual Aids: Use icons, color coding, and other visual aids to make the interface more intuitive. Visual cues can help users understand the function of different elements and navigate the product more easily.
Conduct usability testing to identify any areas of the interface that users find confusing or difficult to use. Use this feedback to make iterative improvements to the design.
5. Create product collateral for proactive guidance
Equip your users with resources to help them navigate the onboarding process. Make these resources easily accessible within the product. This proactive approach reduces user frustration and reliance on customer enablement, making for a smoother onboarding experience.
This could be a series of short tutorial videos, a searchable FAQ section, or a chatbot that answers common questions.
💡 Creating product collateral made easy with Floik
Floik helps you create visually rich and interactive product collateral in multiple formats—demos, videos, and guides. With Floik, you can:
Auto-Generate Collateral: Record once and Floik will create guides, product tours, or self-served demos based on your use case.
Real-Time Analytics: Gain insights into views, watch time, and CTA click throughs.
Interactive Content: Guide users to take further action with customizable call-to-action buttons.
Custom Branding: Create branded content with your company’s logo and brand colors with a custom domain link.
Level up your onboarding with a product-led experience
We've journeyed through the maze of creating a seamless, product-led onboarding experience, and now you’re ready to design yours!
Remember, the key is to keep your product at the heart of the onboarding process, guiding users to discover its value on their own terms.
With a powerful solution like Floik, creating engaging, interactive product collateral is no longer a daunting task. It's about making the process as smooth for you as it is for your users.
Let's make your product not just a tool, but an experience that your users look forward to every day.
-p-130x130q80.avif)

.svg)


.avif)
.avif)
.avif)
.avif)
.avif)
.avif)
.avif)


.avif)